Do you know how to jump start a car – and by ‘know’ we mean have you tried doing it before? The reason we ask is that it’s not something you want to research in your hour of need. It’s the kind of thing you want to read about or watch someone do before you need to put it into practice.
Ask no more. In this article, we’ll make sure that and more is available. You get simple instructions on how to jump start a car and when you shouldn’t. And, depending on which of the two methods outlined below you use, there’s a video for each you can watch at the end.
Find all this out in less than 10 minutes…
When do you need to jump start a car?
Your car’s battery can easily go flat for a number of reasons. Most of the time, we’ve unwittingly left some car light on that’s drained all the power. Just like your phone’s battery can go flat, so you can your car’s. Of course, the culprit may be harder to identify.
For example, some lights may stay on because they’re not functioning well. That’s usually fine because you can simply switch them off, provided you can see them. If the light is in a sneaky place such as your boot or glove compartment you may need to do some troubleshooting to find it.
If you haven’t driven your car for a while and not been starting it that can also be the drain. Speaking of which, find out if you still need a car insurance policy if you’re not driving atm.
Otherwise, there may also be something wrong or broken either in your car’s circuitry or the battery itself. So you may need to call in a mechanic. First, however, the best thing to do is see if you can jump start your car. If it works and your car switches on, but even after driving your battery dies again, there may be something wrong with your battery.
Can you jump start new cars?
If your car’s a 2000 or newer model, you shouldn’t jump start it. Your car relies on various software and technology that can easily meltdown from the voltage that comes from jumper cables. This damage could be far more costly to fix then buying a jump starter or replacing your battery.
Instead, the safest bet is using a jump starter. They’re also safe to use on older models, so if you’re unsure which method to use, get yourself a jump starter. A jump starter is a portable battery device that modulates the flow of electric current so the surge is low enough not to damage your car’s computer system.
You can follow the steps below (we’ve made a note below for you to leave out steps three and four) using your jump starter instead of jumper cables / second car with a jump starter.
What you need
Jump starting a car may sound complex and on one hand it is. But on the other, it’s also an impressive process when you’re hands-deep in it. You’re literally bringing your car back to life by creating an electrical circuit.
This may sound like child’s play for all the sound engineers and electricians out there, but it’s certainly not something you can ad-lib on. If done incorrectly, it can be dangerous.
Here’s what you’ll need:
Newer cars (usually models from 2000 or later)
- A jump starter
OR
Older cars (usually models pre-dating 2000)
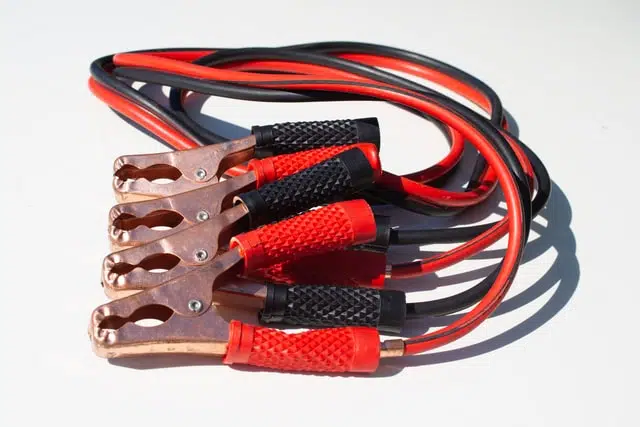
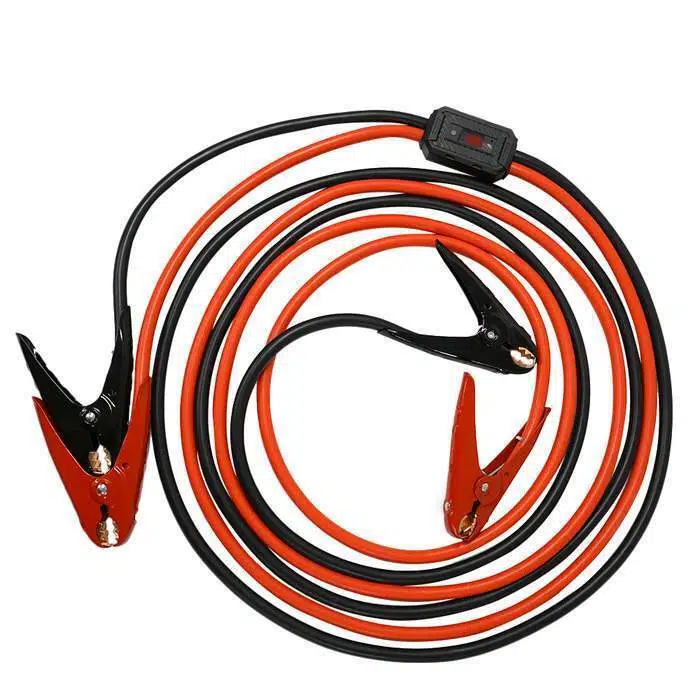
- A set of jumper cables (also called booster cables) but remember you can use a jump starter instead
- A good Samaritan with a car that has a healthy working battery (if you use a jump starter, you won’t need help and a 2nd car)
And remember, if you have any doubt whether your car falls into the older/newer group – go for the jump starter method rather than jumper cables.
Now that you know what you need, we’ll guide you through the steps in this picture.
Take note of variables depending on whether you use jumper cables or a jump starter (newer cars will skip steps three and four). And If you’re a visual learner, you can also skip to the videos further down.
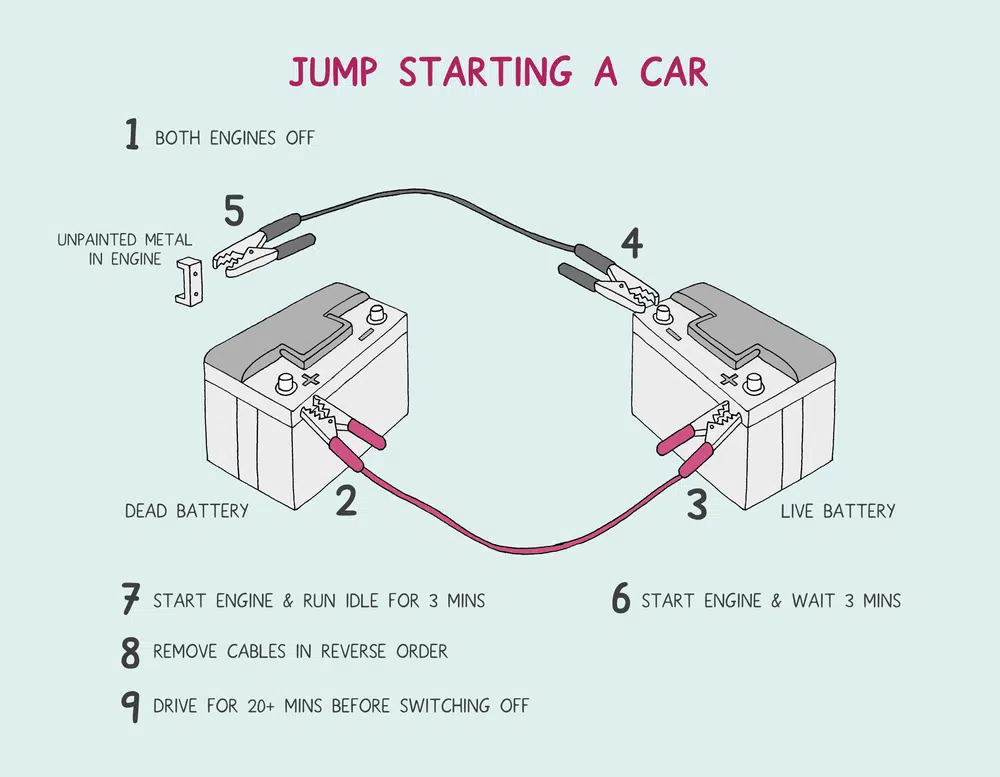
Step 1 – Both engines off
Newer cars: If you’re using a jump starter, make sure it’s charged before use. Position it in the engine bay and make sure it’s switched and so are all electronics in your car, like for example, lights and the radio. (We know they’re dead, but make sure the switches are off anyway). Skip the rest of this step.
Older cars: First, you need to phone a friend, relative or neighbour and ask them to bring their car over.
Park both cars nose to nose, or with both bonnets as near to each other as you can. The distance needs to be able to accommodate the length of your jumper cables. Once positioned, your friend will need to switch off their car. Make sure both cars are parked in neutral with their hand brakes on.
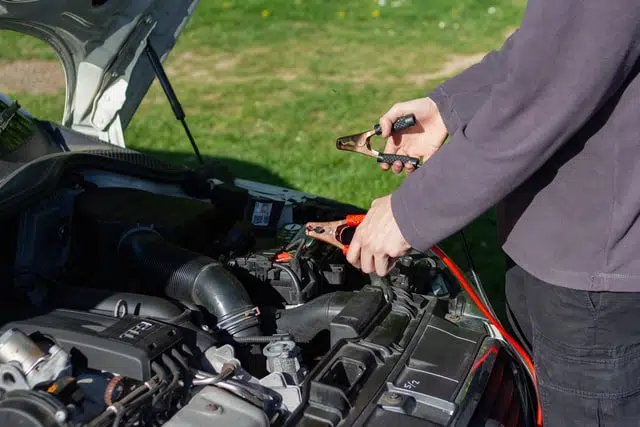
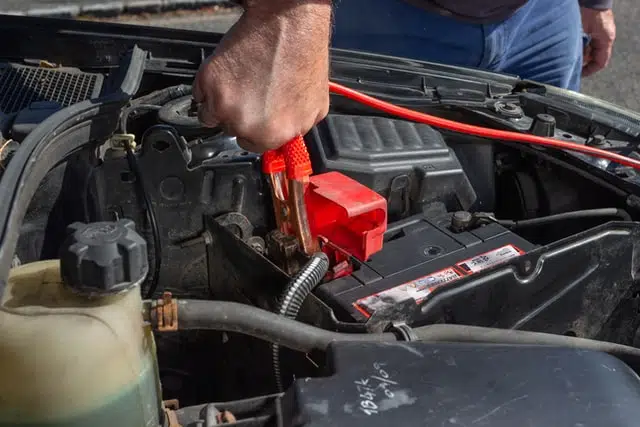
Step 2 – Red cable to dead battery
Newer cars: You’ll still complete this step, but you’ll only have one red cable end, not two, which simplifies your options. Make sure your jump starter is still switched off – it will sound an alarm if you connect the cables the wrong way.
Older cars: Start by taking one end of the red cable clip and clamping it to the positive connector on the battery. You may not be sure where this is. Take a look at the battery, you’ll notice it has parts that stick out which are marked with either a plus symbol or simply the letters ‘POS’.
On some cars, there’s no marking to help identify the positive terminal, but you’ll know it because it’s the bigger of the two connection points. If you’re still unsure, read up on signs of negative and positive on car battery terminals.
Step 3 – Red cable to live battery
Newer cars: Skip this step
Older cars: Now take the other end of the red cable and clamp it to the positive connector on your co-conspirator’s car battery.
Step 4 – Black cable to live battery
Newer cars: Skip this step
Older cars: Now, begin with the black cables, clamping one end to the negative terminal on the other car. It’s really important to note that with this cable you’re beginning the process with the live battery and not your own.
Step 5 – Black cable to unpainted metal in engine
Newer cars: You can connect your black cable clamp to your battery’s negative terminal OR your chassis (according to what the user manual says). Your Jump starter should still be switched off.
Older cars: Now look for a metal surface under your bonnet that’s as far away from your battery as possible. Any metal part will do, provided it’s unpainted. Take the remaining end of the black cable and clamp it to this surface.
You may wonder why you’re not clamping it to your battery. Quite simply, this point in the circuit is to earth the flow of electricity. It helps prevent any sparks from flying.
Step 6 – Start engine and wait 3 minutes
Newer cars: Switch on your jump starter then move to the next step.
Older cars: Now it’s time for your jump start friend to start their engine and let it idle for around three minutes.
Step 7 – Start engine and idle 3 minutes
Newer cars: Switch on your engine. You do not need to have any waiting time between switching on your jump starter and your engine. Keep your car running for a few minutes to build it’s own charge.
Older cars: It’s time! Try starting your car to see if it’s received enough charge to get the battery going. If nothing happens, give your car another five minutes to get sufficient charge before trying to start your car again. Also make sure the clamps at the ends of the cables still have a good hold and haven’t slipped off.
Once your car starts don’t switch it off – you still need to do step nine before your battery’s fully charged.

Step 8 – Remove cables in reverse order
Newer cars: Switch off your jump starter. Then unclamp the cables in reverse order – so this time, black first, then red.
Older cars: Remove the cables in the exact reverse order from how you initially connected them, while the car is running. Be sure not to let the clamps touch each other or any parts of the car.
Step 9 – Drive for 20+ mins before switching off (everyone)
Once your car’s up and running, take a drive for 20 – 30 minutes. This should completely charge your battery up and the great part is your battery is now charging itself.
Yes, you may only have planned to drive for 15 minutes and now you need to stay on the road longer. Make a drive of it. Switch on the radio, sing along. Enjoy your newly-mobile car!
How to fix your dead car battery
Be sure to also read how to fix your dead car battery for more ways to start a car. Also know that if your battery doesn’t switch on with a jump start, it may be time to buy a new one.
Watch how to start a car with jumper cables
Now that you’ve read through the steps to start your dead battery, watch how it’s done:
Jump starter (the safest option)
Watch how to use a jump starter for newer cars – and remember to read your owners manual for any details specific to your jump starter:
Jumper cables
Watch how to use jumper cables for older cars:
Car insurance and roadside assistance
Whether you choose PD Insurance’s comprehensive car insurance, third party property damage or third party fire and theft, you can add on our roadside assistance. 24/7 roadside assistance costs just $89/year.*
*At time of publishing.